When creating a tutorial, each step is automatically assigned an action based on what the creator did during the capture process. What some don’t realize is, once you’re in the editor, there are additional options for the actions Click, Type, and Info.
CLICK

The “Click” action includes “DoubleClick” & “Open Link.” Check “Open Link” and populate the text field with a valid URL to open a new tab with the specified URL upon clicking the highlight box. The learner will need to close the tab when finished & return to the tutorial to continue through the tutorial.
The tutorial below will show you where these are located in the interface and how to apply them.
TYPE

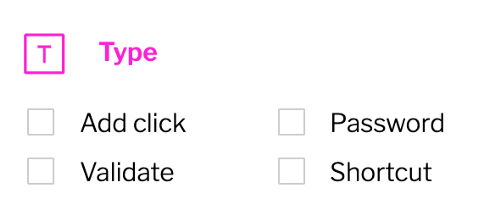
Our “Type” action comes with a few options as well, including “Add Click,” “Password,” “Validate,” “Match Case,” and “Shortcut.” “Add Click” will add an additional “click highlight box” on the same step as the type action. A common scenario for applying the “add click” is on a login page. The user will type their password & immediately click “login.”
This brings us to the next option, “password.” This could be applied to password text fields, so when the learner types in the text field the characters will show as password dots.
It is important to note, iorad does NOT store or save any data typed into the text fields, whether it be during tutorial creation or as the learner is interacting with the tutorial player.
Next we have the “Validate” option. As a creator, you have a few of options. You can choose to leave the text field in the editor blank, type a response that provides extra guidance, or validate the entry. If the text field is left blank, the learner can type anything to advance to the next step. However, if the creator types something & checks “Validate,” then the learner must type that exactly in order for the player to advance.
Piggybacking off of this is “Match Case.” The “Match Case” option would turn the text field case sensitive. For example, the creator types in “Save” with a capital “S,” the learner must type in “Save” with a capital “S” to advance to the next step.
The following tutorial will simulate how to apply these options.
Info

The Info option is great for giving the learner more information around why or when they would perform the following actions. There are only two additional options for the “Info” action, which are “Auto-advance” and “Transparent.” “Info” actions are set to Auto-advance by default. It will advance in .3 sec per word. You can uncheck it if you would prefer your learner to advance the step by clicking “next” on the highlight box.
The other option is “transparent,” a highly requested feature to be able to “remove” the highlight box from the screen. The highlight box is important for the app to know what part of the screen to focus in on but sometimes isn't necessary for the learner to see. An example of this is when you just want to provide information about a step with no action necessary by the learner. Check “transparent” to make the highlight box become transparent. When the learner takes the tutorial, they will not see the box on the Info step. [Please note, the box will remain visible to the creator while in the editor.]
Check out the tutorial to see how to remove “auto-advance” or to apply transparency to the highlight box.
Hope you find this helpful & that it can help you become an iorad power-user!


